
Air Fryer Basket Cleaning: Complete Care and Maintenance Guide
Last Updated: November 16, 2026
- How Often Should You Clean Your Air Fryer Basket?
- What Is the Safest Daily Washing Method for Non-Stick Baskets?
- Can You Put an Air Fryer Basket in the Dishwasher?
- How Do You Remove Stubborn Baked-On Grease Without Scratching the Coating?
- What Natural Ingredients Safely Dissolve Oil Buildup?
- How Do You Eliminate Lingering Burnt Odors from the Basket?
- How Can You Prevent Food from Sticking During Future Cooking?
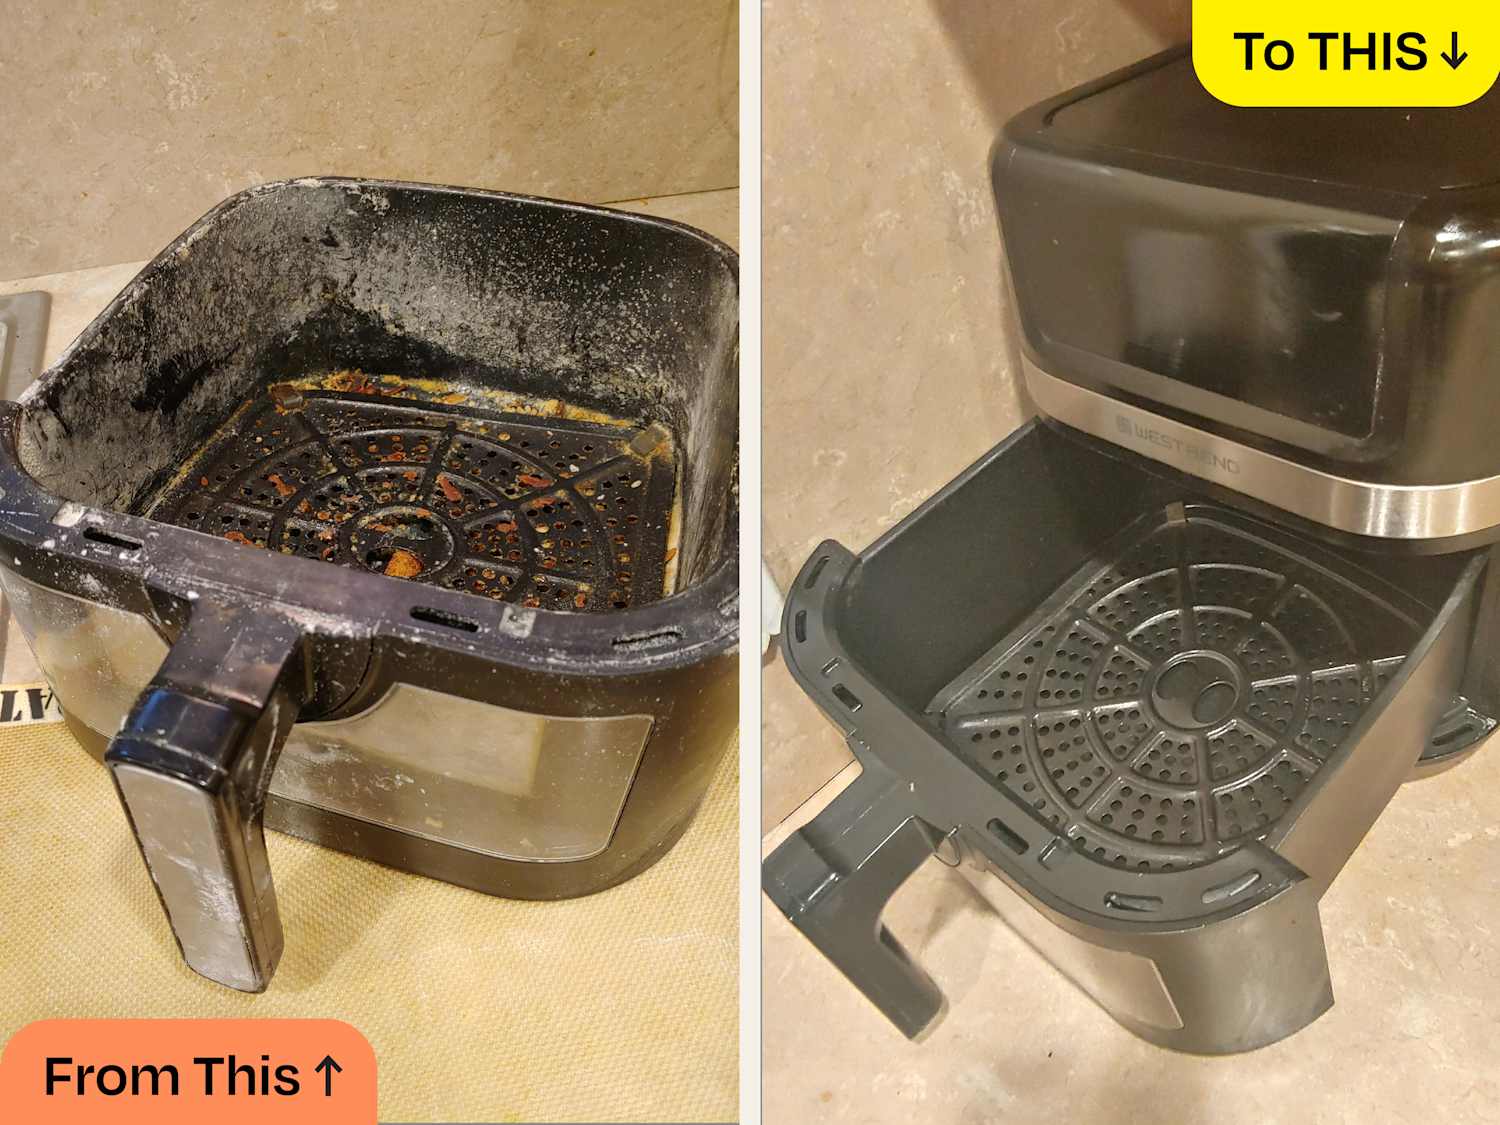
Your air fryer basket turns a little oil and circulating hot air into crisp meals, but the same heat can leave grease and small food particles behind. Cleaning the basket promptly keeps old residue from building up and makes it easier to prepare your next meal without unwanted smells.
Fortunately, caring for most removable baskets does not require harsh cleaners or a great deal of scrubbing. Warm water, a little dish soap, and a soft sponge handle ordinary messes; a short soak can help when food has dried onto the surface. The important first step is to check the instructions for your particular appliance, since baskets, inserts, and coatings differ.
In this guide, you’ll find a simple routine for daily washing, ways to loosen stubborn grease without scratching, and practical tips for keeping food from sticking. You’ll also learn when to avoid the dishwasher and what to do if odors linger after a wash.
How Often Should You Clean Your Air Fryer Basket?
Wash the removable basket and any crisper plate after every use, once they are cool enough to handle. Even when the basket looks clean, a thin film of oil or a few crumbs can remain around the holes and edges. Removing them before the next meal helps prevent residue from baking onto the surface and keeps flavors from carrying over.
Let the appliance cool, unplug it, and take out the removable parts according to the manufacturer’s instructions. Empty loose crumbs into the trash. If the basket contains liquid grease, let it cool and dispose of it in a suitable container rather than pouring it down the drain. Then wash the food-contact parts with warm water and mild dish soap.
A quick rinse alone may be enough to remove loose crumbs, but it generally will not lift an oily film. Use a soft sponge on the inside and outside of the basket, the underside of the insert, and the places where the pieces meet. Rinse away the soap and allow everything to dry completely before reassembling it.
The main appliance needs attention too, but it should never be submerged. With the appliance unplugged and cool, use a lightly damp cloth to wipe accessible interior surfaces and the exterior as directed in your manual. Check around the heating element for splashes or crumbs, taking care not to bend the element or force water into openings. Consult the manual before cleaning any area you cannot easily reach.
After a particularly greasy meal, inspect the drawer, handle junction, and nearby surfaces for drips. If you notice a sticky film, loosen it with a cloth dampened with soapy water, then wipe with a clean damp cloth. Dry all surfaces before reconnecting the appliance.
How often you need a longer soak depends on what you cook. Breaded foods, sugary marinades, and fatty meats can leave more residue than plain vegetables. Treat visible buildup as soon as you notice it rather than relying on a fixed deep-cleaning schedule. If the basket is clean after a normal wash, extra scrubbing is unnecessary and can wear the finish.
If you use the appliance again the same day, clean the basket between different foods when residue, allergens, or raw animal products could transfer. Follow food-safety practices for raw meat and poultry: wash hands and utensils, clean food-contact surfaces thoroughly, and avoid splashing contaminated water around the sink.
What Is the Safest Daily Washing Method for Non-Stick Baskets?
The safest everyday method for most non-stick baskets is to wash by hand with warm water, mild dish soap, and a nonabrasive sponge. Before starting, unplug the fryer and let the basket cool. Placing a very hot basket directly into cold water can stress materials, so give it time to reach a comfortable handling temperature.
Remove the crisper plate or rack if the manufacturer says it is removable. Shake or brush loose crumbs into the trash, then rinse the basket and insert with warm water. Add a small amount of dish soap to a soft sponge or cloth and wash the food-contact surfaces, including corners and perforations. A soft-bristled brush can help reach narrow gaps if your manual permits it.
If residue resists the sponge, fill the removable basket with warm, soapy water and let it soak for a short period. Check the manual first if the handle or basket contains parts that should not be immersed. Use the sponge again after the soak rather than pressing harder. For stubborn bits, a silicone or wooden utensil may help lift loosened food, but avoid prying at the coating.
Rinse thoroughly so no slippery soap film remains. Wipe with a clean, soft towel or set the parts on a clean rack to air-dry. Make sure water has drained from handles, seams, and the underside of the insert before putting the basket back into the appliance. A silicone dish drying mat can provide a place to rest the washed parts while they dry, provided air can reach the surfaces.
Do not use steel wool, metal scrapers, harsh scouring powders, or the rough side of a sponge unless the manufacturer explicitly approves the tool. Avoid oven cleaners and other strong chemicals not intended for the basket. Scratches can make future cleaning harder and may compromise the finish. Our guide to non-stick pan coatings explains why gentle handling matters across different coated cookware surfaces.
Keep the electrical base away from running water. If its interior needs a wipe, use a barely damp cloth on a cool, unplugged appliance and follow the manual. Never spray cleaner directly into the heater or vents. When the surface has worn, peeled, or become damaged, stop using abrasive methods and check the maker’s guidance about replacing the affected part.
Can You Put an Air Fryer Basket in the Dishwasher?
Some air fryer baskets and removable plates are labeled dishwasher-safe, but others are not. The reliable answer for your appliance is the manufacturer’s manual or care label for each individual part. A basket, its insert, and its handle may be made from different materials, so do not assume that approval for one piece applies to all of them.
If the manual allows dishwasher cleaning, remove loose food first and place each part so water can reach the surfaces and drain away. Keep it from rubbing against sharp utensils or neighboring cookware during the cycle. Use the detergent and placement recommended by the manufacturer, and let the pieces dry fully before returning them to the fryer. If there is no clear guidance about a part, hand-washing it is the more cautious choice.
Dishwasher-safe does not necessarily mean that every cycle is equally gentle. High heat, concentrated detergent, and contact with other items can be hard on some finishes over time. Many home cooks therefore choose hand-washing for coated baskets even when the maker permits a dishwasher. This is a maintenance preference, not a claim that every dishwasher cycle will damage every basket.
Never put the main appliance, electrical cord, or plug in the dishwasher. These parts contain electrical components and must stay dry. Likewise, do not immerse a removable piece if its care instructions prohibit it or if it has electrical connections. Use a damp cloth only where the manual allows, and keep water out of vents and controls.
After a cycle, check the basket for food trapped in the perforations or beneath the removable insert. Clean any remaining residue gently by hand. Inspect the surface periodically for scratches, peeling, or other damage. If a coating is coming away, follow the appliance maker’s replacement advice instead of trying to scrape off the loose layer.
When a basket is too large or awkward for your dishwasher, avoid wedging it into place. A careful hand wash is often simpler and allows you to see whether grease remains around corners. For dried-on messes, a brief warm, soapy soak followed by a soft sponge is usually a better first step than increasing the dishwasher temperature or adding extra detergent.
How Do You Remove Stubborn Baked-On Grease Without Scratching the Coating?
Baked-on grease can be stubborn, but a stronger scrub is not necessarily the answer. Start by unplugging the appliance and allowing the removable basket to cool. Empty crumbs and excess grease, then inspect the surface. If the finish is already peeling or scratched deeply, consult the manufacturer before continuing and ask about a replacement basket.
For an intact basket that can be soaked, add warm water and a little mild dish soap. Let the water soften the residue for about 15 to 30 minutes, or follow the soak time in your manual. Keep any parts the manufacturer says must remain dry above the waterline. Never fill or soak the electrical body of the appliance.
After soaking, use a soft sponge or a nonabrasive cloth to work over the greasy area. Use gentle pressure and small movements, paying attention to the corners and holes where residue collects. If food remains, repeat the soak rather than reaching for steel wool. A soft brush can help around perforations if it is suitable for the basket’s finish.
For a stubborn patch, try a small amount of baking soda mixed with water into a loose paste only if the manufacturer permits it. Apply it lightly with a soft cloth, allow it to sit briefly, and wipe without vigorous scrubbing. Baking soda can be mildly abrasive, so test a discreet area first and avoid it if the care instructions forbid it. Rinse thoroughly afterward; do not leave paste trapped in seams.
A silicone or wooden utensil can lift food that has already softened, but do not use a knife, metal spatula, or sharp scraper. Keep the edge flat and work slowly rather than digging at the coating. If the grease does not release, another soak is safer than forcing it. Strong oven cleaners, bleach, and abrasive powders are not a substitute for the manufacturer’s approved cleaning products.
Once the residue is gone, wash the basket again with mild dish soap, rinse it well, and dry all parts completely. Check the inside of the drawer and the underside of the plate, where a small amount of oil can hide. If buildup persists in a place you cannot safely reach, consult the appliance maker instead of dismantling the appliance or applying cleaner to electrical components.
Finally, change the routine that caused the buildup. Wash after every use and pay extra attention after cooking sticky sauces or fatty foods. Removing a thin fresh film is much easier than trying to lift several cooked-on layers later.
What Natural Ingredients Safely Dissolve Oil Buildup?
Warm water and ordinary dish soap are the most useful starting point for oily residue. Dish soap is formulated to help lift grease so it can be rinsed away; letting the basket soak gives the water and soap time to reach dried-on food. You do not need a complicated mixture for a routine clean, and the manufacturer’s care instructions always take priority.
Baking soda is sometimes used on stubborn spots, but it should be treated as a mild abrasive rather than a powerful grease solvent. If the basket’s instructions allow it, combine a little baking soda with water to make a loose paste. Place a small amount on a soft cloth, test a discreet area, and wipe gently. Rinse carefully and wash with mild soap afterward. Skip this approach if the coating maker advises against abrasive materials or if the finish is damaged.
White vinegar is acidic and can help with some mineral deposits and odors, but it is not a universal solution for cooked-on oil. Acidic cleaners can be unsuitable for certain coatings, metals, seals, or finishes. Use vinegar on a removable basket only if your manufacturer permits it; dilute it as directed and rinse thoroughly. Avoid long soaks or leaving acidic liquid on the surface when the manual offers no such approval.
Lemon juice is also acidic, so the same caution applies. Its fresh scent should not be confused with proof that a greasy surface is clean. A mild soapy wash and thorough rinse are a more dependable first step. Do not put lemon juice or vinegar in the electrical base, spray them into the heater, or heat a cleaning mixture inside the appliance unless the manufacturer specifically directs you to do so.
Mixing vinegar and baking soda produces fizz, but that reaction does not make the combination a stronger all-purpose degreaser. It also makes it harder to know which ingredient is acting on the surface. Use one approved approach at a time and rinse between treatments. Never mix household cleaners, especially bleach with acids or ammonia, because hazardous fumes can result.
For grease that remains after a normal wash, repeat the warm soapy soak and wipe rather than increasing the strength of a homemade mixture. Finish by rinsing until there is no residue or scent of cleaner, and dry the basket and insert completely. The simplest method that gets the part clean while protecting its finish is the one to repeat.
How Do You Eliminate Lingering Burnt Odors from the Basket?
A burnt smell often comes from small pieces of food or an oily film left on the basket, crisper plate, or inside the appliance. Begin by switching the fryer off, unplugging it, and allowing it to cool. Remove the basket and plate, then look underneath the insert and around corners where crumbs can hide.
Wash the removable pieces with warm water, mild dish soap, and a soft sponge. Soak the basket briefly if its instructions permit and if residue has dried on. Rinse away all soap and dry the pieces thoroughly. A clean basket that still smells strongly may need another gentle wash, particularly around seams or perforations.
Next, inspect the cool interior of the unplugged appliance. A crumb or grease splash near the heating element can continue to smell even after the basket is clean. Follow your manual for access and cleaning: wipe permitted surfaces with a lightly damp cloth, avoid bending the element, and keep water out of electrical openings. Do not immerse the base or spray cleaner directly inside it.
Allow the washed parts to air out in a well-ventilated place after drying. An open basket can release lingering food odors more readily than one stored wet and closed inside the drawer. Make sure there is no moisture left around the handle, insert, or seams before reassembling. Store the appliance only after its parts are completely dry.
If the manufacturer allows baking soda on the basket’s finish, a gentle treatment followed by a thorough wash may help with a lingering smell. Avoid abrasive rubbing, and do not heat a paste or liquid cleaner in the fryer. Vinegar or lemon may be unsuitable for some materials, so use them only when the care instructions approve them. Fragrance alone does not remove the food or oil causing the odor.
If the appliance produces smoke, a strong electrical or plastic smell, or an odor that continues after careful cleaning, unplug it and stop using it. Check the manual and contact the manufacturer or an authorized service provider. Do not attempt to disassemble the electrical housing or run repeated empty heating cycles as a cleaning shortcut. A lingering smell may have a cause that needs professional attention.
To prevent the problem, remove crumbs after each use and wash away oil before the next cooking session. Avoid overfilling the basket, which can place loose food close to the heating element. Keeping the removable parts clean and the appliance interior free of stray debris is more effective than trying to cover a burnt smell later.
How Can You Prevent Food from Sticking During Future Cooking?
Preventing sticking starts with a clean, dry basket. A layer of old grease or food can create rough patches that catch the next meal, so wash the basket and insert after each use and dry them before cooking. Inspect the coating regularly; if it is peeling or badly scratched, check the manufacturer’s advice about replacing the part.
Prepare food according to your recipe and appliance instructions. Patting excess surface moisture from foods such as vegetables or potatoes can help them brown, although some foods naturally release more moisture as they cook. When a recipe calls for oil, use a modest amount on the food or apply it as the appliance maker directs. More oil is not automatically better: excess can collect in the drawer and make the next cleanup harder.
Check your manufacturer’s advice before using any aerosol cooking spray on a coated basket. Some sprays contain ingredients that may leave a difficult-to-remove film, and recommendations vary by product and appliance. If oil is appropriate, a small amount brushed or rubbed onto the food can offer more control than coating every part of the basket.
Leave enough space for hot air to circulate, and cook in batches when necessary. Crowding can cause food to steam and stick together, while loose pieces may collect against the sides. Arrange food according to the recipe and turn or shake it when directed, using utensils that are safe for the basket’s finish. Avoid metal tools that scrape the coating.
Some foods release more easily after they have browned. If a piece resists when you first try to turn it, follow the recipe and give it a little more time rather than forcing it off with a sharp utensil. Carefully lift it with a silicone or wooden tool suitable for the appliance. Use food-safety guidance and a thermometer where needed; appearance alone does not establish that meat is safely cooked.
Liners can reduce direct contact with the basket, but they must be intended for air fryer use and fitted according to the manufacturer’s instructions. Do not place loose parchment in the appliance during preheating or without enough food to hold it down: circulating air could lift it toward the heating element. Keep liners away from the heater and do not block airflow. If the manufacturer does not approve a liner, leave it out.
After cooking, let the appliance cool and remove food gently. Wash any remaining residue before it hardens, dry the parts, and put them away clean. Small habits—appropriate oil, sensible portions, gentle tools, and an after-use wash—help protect the basket while keeping everyday cooking convenient.

Copyright 2026 © Beyond the Embrace
Beyondtheembrace.com is a participant in the Amazon Services LLC Associates Program, an affiliate advertising program designed to provide a means for sites to earn advertising fees by advertising and linking to Amazon.com.